Nov 4, 2022
Configuring custom domain names – Creating and Configuring App Services
Configuring custom domain names
Custom domains allow you to connect to your web application using the public DNS name that you have chosen for your application. To do this, you need to own the respective domain and prove that you have authority over it. Your custom domain could be, for example, www.yourapp.com. There are several providers for purchasing a domain, though this is outside the scope of this book. For suggestions on getting started, you could buy directly from Microsoft, which also leverages GoDaddy. To configure a custom domain, follow these steps:
- Navigate to the App Service plan you worked on in the previous exercises.
- From the left menu blade, theSettings, click Custom domains. From the blade that appears, click + Add custom domain.
- Enter a Custom domain name of your choice, such as www.yourapp.com (this must be for a domain that you own). Click Validate:
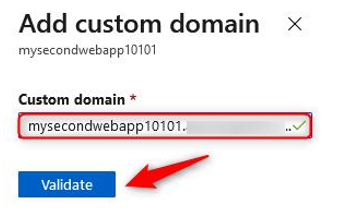
Figure 12.42 – Add custom domain
- You will be presented with a screen that gives you a Custom Domain Verification ID:
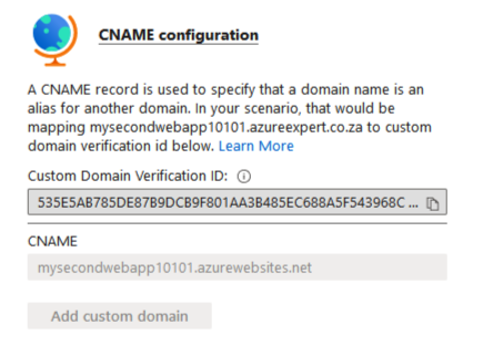
Figure 12.43 – CName configuration
Copy this ID and create a new CName and TXT record for your domain, as follows. These values will be used to determine that you have authority over the domain you have specified:
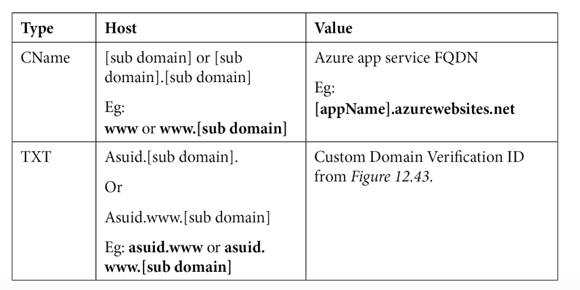
Top Tip
You can also map custom domains using A records or a wildcard (*) CNAME record. Go to https://docs.microsoft.com/en-us/azure/ app-service/app-service-web-tutorial-custom-domain?tabs=a%2Cazurecli#dns-record-types for more details.
- Once completed, click the Validate button again.
- The following screenshot shows an example of the TXT and CName records that you may have created with your domain host (all the providers have slightly different configurations):

Figure 12.44 – TXT and CName records
- You will get two successful messages after clicking the Validate button. Now, click Add custom domain:
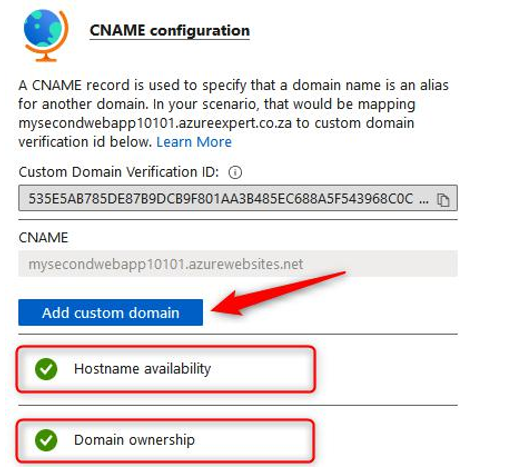
Figure 12.45 – Add custom domain
- With that, your custom domain has been added. However, you now have an entry on your screen that shows that this endpoint is not secure. You will need to add a certificate to make it secure. Click TLS/SSL settings from the left menu:

Figure 12.46 – Insecure custom domain
- Click the Private Key Certificates (.pfx) tab. Then, click + Create App Service Managed Certificate:
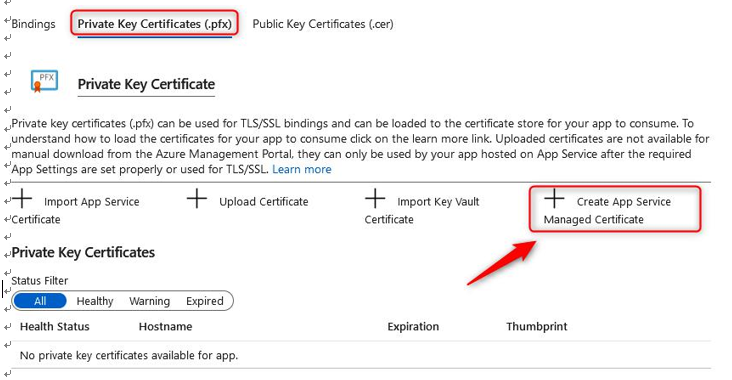
Figure 12.47 – Private Key Certificate
- Once Azure has analyzed the eligibility of the hostname, click Create. Azure allows one certificate per web app to be generated by the platform for your custom domain. This can save you a lot of money as, typically, you will need to procure a certificate from a third-party vendor. Your certificate will be valid for 6 months once it’s been created.
- DNS propagation can take up to 48 hours to occur, though sometimes, this can happen within minutes, depending on whether your DNS was used and the Time to Live (TTL) setting has been configured. You should now be able to browse your web app using the custom domain you configured. Note that you can connect using HTTPS and get a valid certificate check:
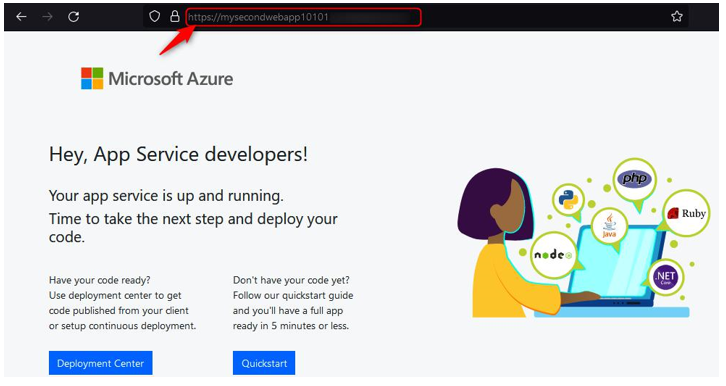
Figure 12.48 – Browsing to your custom domain
You now know how to configure a custom domain for your web app within Azure, as well as how to generate a valid certificate using the platform for a certified secure HTTPS connection. Typically, this can be done for production-based applications that are exposed to the internet and it is a common administrative duty for those that work in organizations that utilize many web applications. In the next section, you will learn how to configure backups for your applications.
More Details