Jul 4, 2023
Creating an App Service plan – Creating and Configuring App Services
Creating an App Service plan
In this exercise, you will be creating an App Service plan for Azure. This will act as the server configuration for hosting your Azure web applications and function applications. Follow these steps to do so:
- Sign in to the Azure portal at https://portal.azure.com.
- Open the resource group you will be using for this exercise, click Overview via the left menu, and clickCreate.
- Type app service plan in the search bar and click App Service Plan:

Figure 12.2 – App Service Plan
- On the next screen, click Create:

Figure 12.3 – App Service Plan – Create
- Enter the name of your Resource Group, then enter a name for your App Service plan. Here, we have used myappserviceplan. Next, choose an Operating System. For this demo, we will deploy a Windows App Service plan. Finally, select your Region and SKU and size; we will select Standard S1. Click Review + create, then Create:
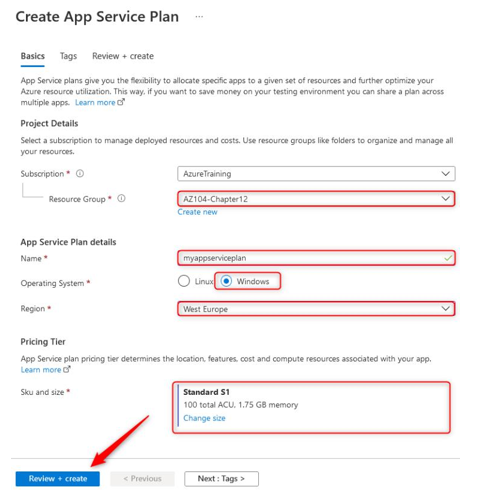
Figure 12.4 – Create App Service Plan
With that, you have configured your first App Service plan and are ready to host your first application on the service. In the next section, you will learn how to create an App Service in your newly deployed App Service plan.
Creating an app service
In this exercise, you will deploy your first web application in Azure using the Azure Web Apps service. Follow these steps:
- Sign in to the Azure portal at https://portal.azure.com.
- Open the resource group you will be using for this exercise, click Overview via the left menu, and clickCreate.
- From the left menu bar, clickWeb, then click Create under Web App:

Figure 12.5 – Web App
- Enter the name of your Resource Group, then enter a name for your web app. Here, we have used myfirstwebapp221221. Next, choose the type of deployment you would like. We will select Code. Note that you could also select a Docker Container. Then, select a Runtime stack – this will support the code you are deploying. Now, choose an Operating System. For this demo, we will deploy a Windows web app; we did this for the App Service plan we deployed previously. Select your Region, this will also be the same as what you selected for your App Service plan:

Figure 12.6 – Create Web App – Basics
Finally, select a Windows Plan – this is the App Service plan you created previously. Note that when you select this, it automatically configures your SKU and size, which will match what you chose for your App Service plan. Also, note that you have the option to create your App Service plan directly in the Deployment menu. Click Next : Deployment >:
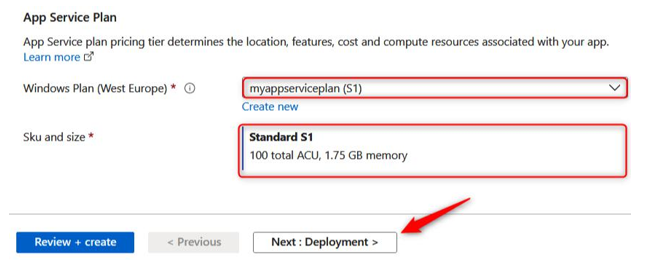
Figure 12.7 – Create Web App – Basics 2
- Here, you have the option to do a Continuous deployment. We won’t be configuring this in this exercise. Click Next : Monitoring >:
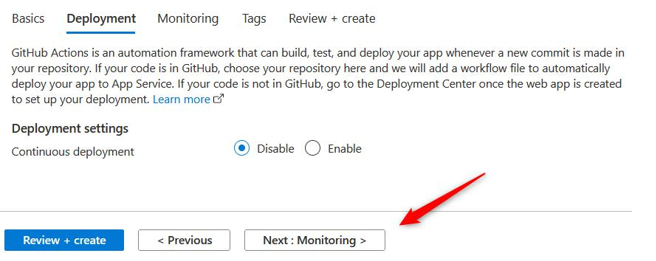
Figure 12.8 – Create Web App – Deployment
- On the Monitoring tab, you will have the option to deploy Application Insights for your application. Note that you can either create a new Application Insights deployment through this blade or create it as part of the deployment. For this exercise, we will select No for Enable Application Insights. Click Review + create, then Create:
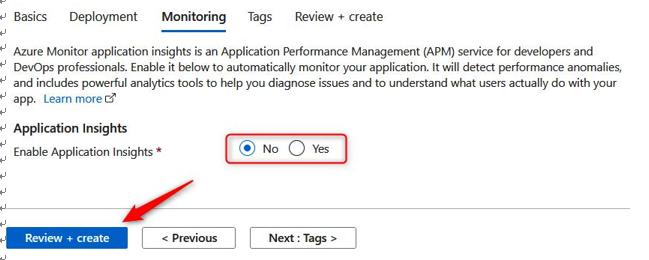
Figure 12.9 – Create Web App – Monitoring
- Navigate to your application, click on Overview via the left-hand menu, and note your URL for your application. This blue text is clickable; you can either click on this or copy it into your browser to navigate to your application to confirm that it’s working:
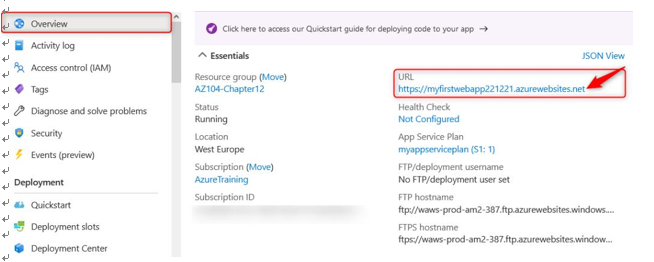
Figure 12.10 – Web App – Overview
You will be presented with a screen similar to the following for your application. Congratulations – you have successfully deployed your application using the Azure portal!
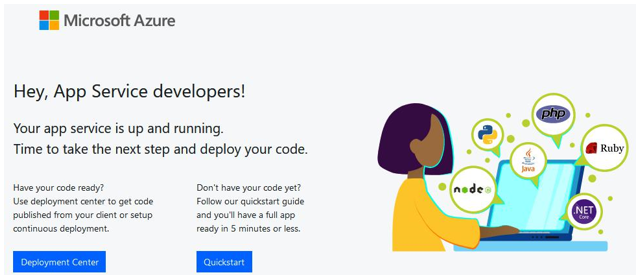
Figure 12.11 – Web App – running in your browser
Now that you know how to deploy a web application using the Azure portal, let’s learn how to do the same using PowerShell. This time, we will create a Linux service plan.
More Details