Jun 15, 2021
Create private and public IP addresses – Implementing and Managing Virtual Networking
Create private and public IP addresses
In the previous section, we had a brief look at IP addressing, such as public and private IP addressing and also static and dynamic IP addresses. This section focuseson how to configure private and public IP addresses.
Let’s first look at how to configure a private IP address for a VM from dynamic to static via the Azure portal. In order to do this, we are going to reference a VM we created earlier in this book:
- Navigate to the Azure portal by opening a web browser and navigating to https://portal.azure.com.
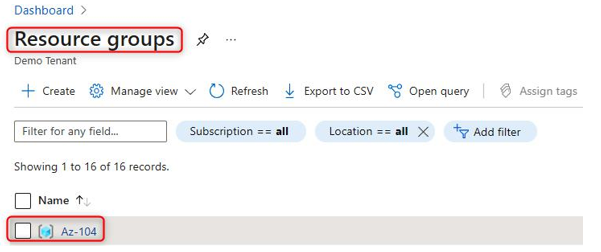
- In the left menu, selectResource groups and choose an RG with a VM. In this case, we’re going to select the Az-104 RG:

Figure 14.10 – Selecting a previously deployed RG that has a VM
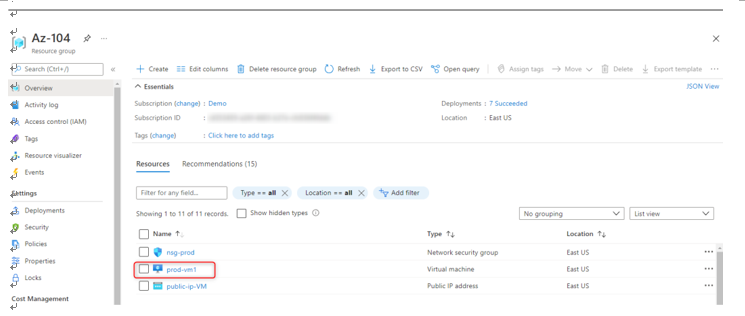
- Next, select the VM:

Figure 14.11 – Selecting a previously deployed VM
- Under the Settings tab, select Networking and click on the Network Interface Card (NIC) associated with the VM:

Figure 14.12 – Select the NIC for the VM
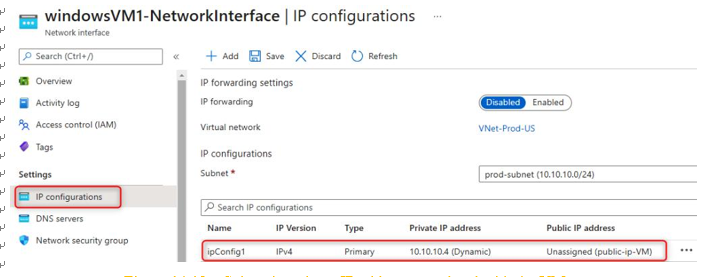
- Next, click on IP configurations and select Private IP address:

Figure 14.13 – Select the private IP address associated with the VM
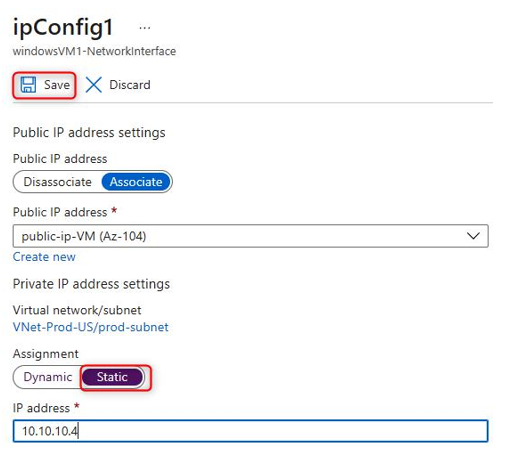
- Finally, under Assignment, select Static instead of Dynamic, and click Save:

Figure 14.14 – Select Static and save the configuration
That is how we configure private IP addresses to be static instead of dynamic.
Next, we are going to look at how to create a public IP address via PowerShell:
- In PowerShell, use the following command to connect to our Azure tenant:
Connect-AzAccount
The following screenshot shows the output of the command:

Figure 14.15 – Authenticating to the Azure tenant via PowerShell
- Next, the following code will create a new static public IP address in the West Europe region as a standard SKU:
$ip = @{
Name = ‘myStandardPublicIP’
ResourceGroupName = ‘VNet_Demo_ResourceGroup’ Location = ‘WestEurope’ Sku = ‘Standard’
AllocationMethod = ‘Static’
IpAddressVersion = ‘IPv4’
Zone = 1,2,3
}
New-AzPublicIpAddress @ip
The following screenshot shows the output of the command:

Figure 14.16 – Creating a new public IP address via PowerShell code
- Finally, verify that the public IP address has been created in the Azure portal:

Figure 14.17 – Verifying the new public IP address in the Azure portal
It is that simple to create a public IP address via PowerShell. Once the IP address has been created, it is now ready to be assigned to a resource such as a VM or other types of resources that support pre-created public IP addresses.
Next, we are going to look at user-defined routing.
More Details