Mar 4, 2021
Implementing subnets – Implementing and Managing Virtual Networking
Implementing subnets
Inside a VNet, subnets allow you to segment your IP address ranges in which to place your resources. Resources in a single subnet get an IP address from the subnet IP address range. Resources in subnets within the same VNet can talk to each other. A VNet can have one or more subnets. Traffic can be filtered between subnets either via Network Security Groups (NSGs) or UDRs. It is also important to know that Azure reserves five IP addresses within each subnet that cannot be used. The reason for this is that these IPs are reserved for the network address, the Azure default gateway, Azure DNS, and the network broadcast address. An example of this would be the following:
Let’s say there is a 10.1.1.0/24 subnet; the following addresses are reserved:
• 10.1.1.0: This is reserved for the network address.
• 10.1.1.1: This is reserved for the default gateway.
• 10.1.1.2 and 10.1.1.3: These are reserved by Azure to map DNS IPs to the VNet space.
• 10.1.1.255: This is reserved for broadcast traffic.
Important Note
Subnets can be added, removed, or modified.
Subnets within a VNet can be managed via the following methods:
• The Azure portal: This is done by signinginto the Azure portal.
• PowerShell: This is done by authenticatingto your Azure tenant and making changes via the Command-Line Interface (CLI).
• The Azure CLI: This is done by authenticatingto your Azure tenant and making changes via the CLI.
• A REST API: This is done by authenticatingto your Azure tenant and using the PUT command.
Important Note
Subnets’ address spaces cannot overlap one another.
Let’s go ahead and add a subnet to an existing VNet via the Azure portal using the following steps:
- Navigate to the Azure portal by opening a web browser and navigating to https://portal.azure.com.
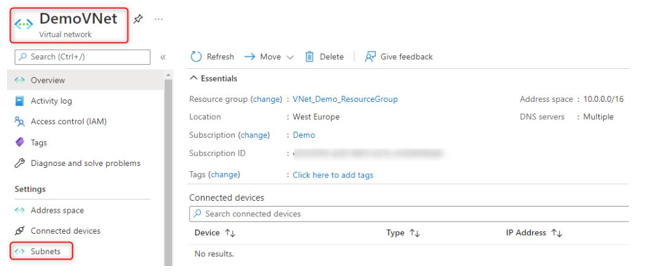
- Browse to an RG that has a VNet. In our instance, this is the VNet_Demo_ ResourceGroup. Select DemoVNet and then Subnets under the Settings blade:

Figure 14.23 – The subnet selection section for a VNet
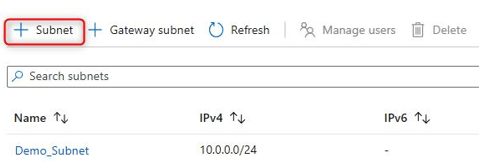
- Next, click on add Subnet:

Figure 14.24 – Adding a subnet
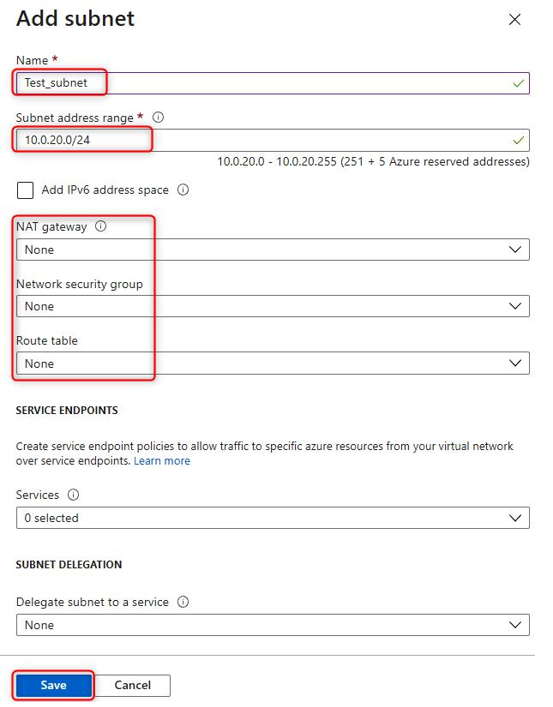
- Provide a name in the Name field and choose a subnet address range that is available based on the VNet range. Set the following fields to None:
I. NAT gateway
II. Network security group III. Route table
IV. SUBNET DELEGATION
Important Note
In the real world, the preceding changes may be configured instead of being set to None, depending on the requirements.
Set the Services fields to 0 selected, and click on Save:

Figure 14.25 – Configuring the new subnet
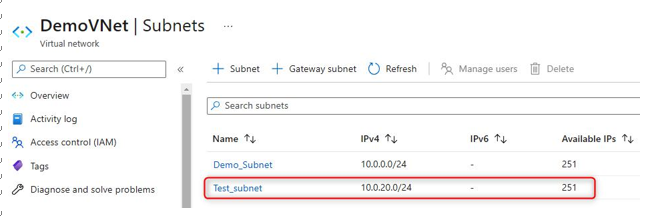
- The new subnet will show up under the Subnets section once created:

Figure 14.26 – A new subnet created successfully
In this short section, we had a look at subnetting in Azure and learned how to create additional subnets via the Azure portal. In the next section, we are going to look at configuring endpoints on subnets.
More Details