Jan 15, 2023
Securing an app service 4 – Creating and Configuring App Services
- The next configuration for inbound traffic isApp assigned address. Clicking this option will take you to the TLS/SSL settings blade. This is used to determine your Custom Domain, which we will configure in the next section. This is another method of enhancing security as the domain can be configured to something that is trusted by your organization or users. It will confirm that you are using certificate delivery to enhance the security of your application:
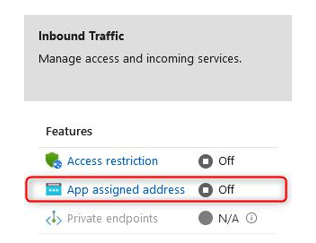
Figure 12.35 – Network settings – Inbound Traffic 2
- The last inbound configuration option is Private endpoints. Selecting this allows you to completely remove all public access to your application. Your application will be assigned an NIC with a private IP from the associated VNet and subnet you connect it to. To enable public access for this configuration, you would need some form of network address translation (NAT) configuration to reach your application. This can be achieved by deploying an Application Gateway or using Azure Front Door, or by using your firewall service to translate traffic from one of its public IP addresses to your application over the private endpoint. This is a great way to secure traffic to your application, but as you can see, it can quickly cause complications. This setting will force you to consider how other components of your application communicate with each other and the outside world.
- For outbound communication, you can perform VNet integration, which will associate your application with a designated subnet. Note that to assign a web app to a subnet, it will need to assume delegated access for the subnet. This means that it can manage the DHCP deployment for the subnet and will be responsible for IP assignment on the subnet. Furthermore, it restricts what can access the subnet and limits you to which subnet can be used for what service as only a single service can have delegated administration. Note that this is for outbound communication only and will not protect inbound communication. The subnet should also be allowed to communicate with the relevant services within Azure. Click VNet integration:
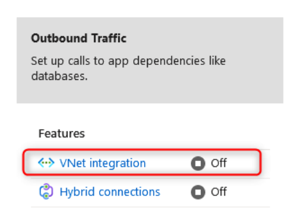
Figure 12.36 – Network settings – Outbound Traffic 1
- Click + Add VNet:

Figure 12.37 – VNet Configuration
- You can also select an appropriate Virtual Network, which will give you the option to either create a new subnet or use an existing one. Use whichever best suits this demo and click OK:
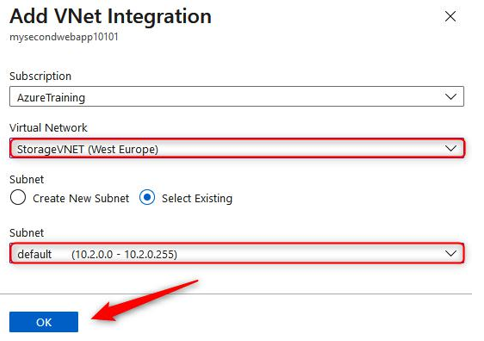
Figure 12.38 – Add VNet Integration
Note that your application is now connected to the VNet and subnet you selected. Note the address details as well. Traffic from your application can now be controlled for outbound traffic using user-defined routes (UDRs) on the network:
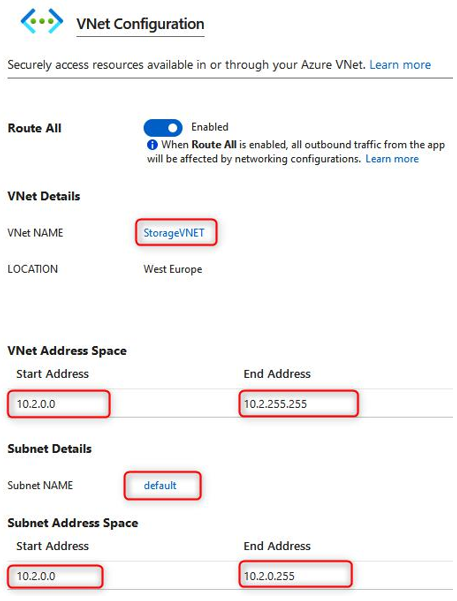
Figure 12.39 – VNet Configuration
- The last configuration item for outbound traffic isHybrid connections. This feature is a service that enables endpoint connectivity for your application and provides
a connection solution where you don’t have direct access paths to your on-premises environments or other environments from Azure. It enables a mechanism for TCP communication that’s mapped to a port number for that corresponding system or service. Each hybrid connection is associated with a single host and port that enhances security as it’s easier to manage and correlate the traffic:
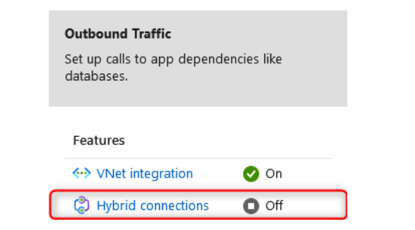
Figure 12.40 – Network settings – Outbound Traffic 2
The final security configuration item to be aware of is the CORS option under API context on the left menu pane. CORS should be disabled unless it’s required as it exposes more vulnerabilities to your application, especially when it’s not managed correctly:
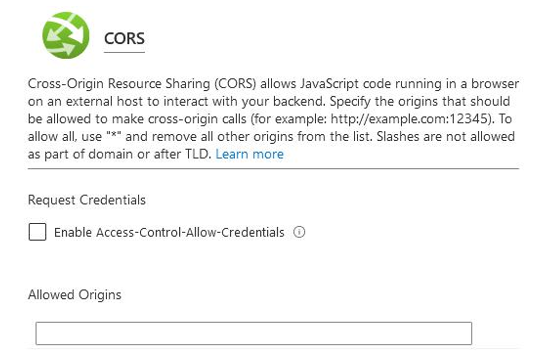
Figure 12.41 – Network settings – CORS
Now that you have reviewed the different security settings, you should feel more familiar with the controls that are available and when to use them. It’s especially important to understand the configurations that are relative to traffic flow. In the next section, you will learn how to configure custom domain names.
More Details